
Setting up InfoTrack integration in Easysoft
You’ve created your InfoTrack account. Now, let’s get it connected to Easysoft.

Step-by-step instructions
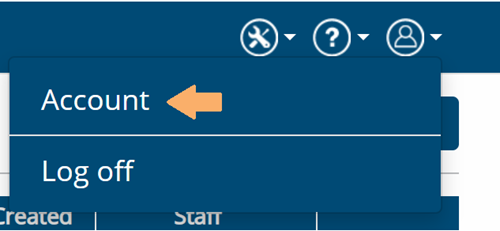
STEP 1
Log into your Easysoft account, click the drop-down menu with the circular “person” icon, and select Account.
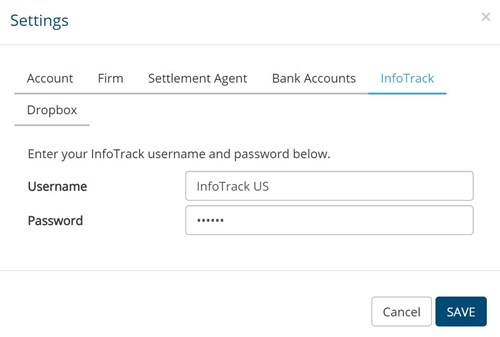
STEP 2
Select the InfoTrack tab, enter in your InfoTrack username and password, and click Save.
STEP 3
Open a case and select either the 1099-S or Title options. You will be directed to InfoTrack.
STEP 4
If you are using one of Easysoft’s desktop products, CDF or HUD, you will only need your InfoTrack password. You will enter it at the time of submitting 1099-S forms.
If you’d like help with setup or placing your first order, please contact us at +1 (844) 340-3096 or fill out our Contact Us form.